RP2040-Shim
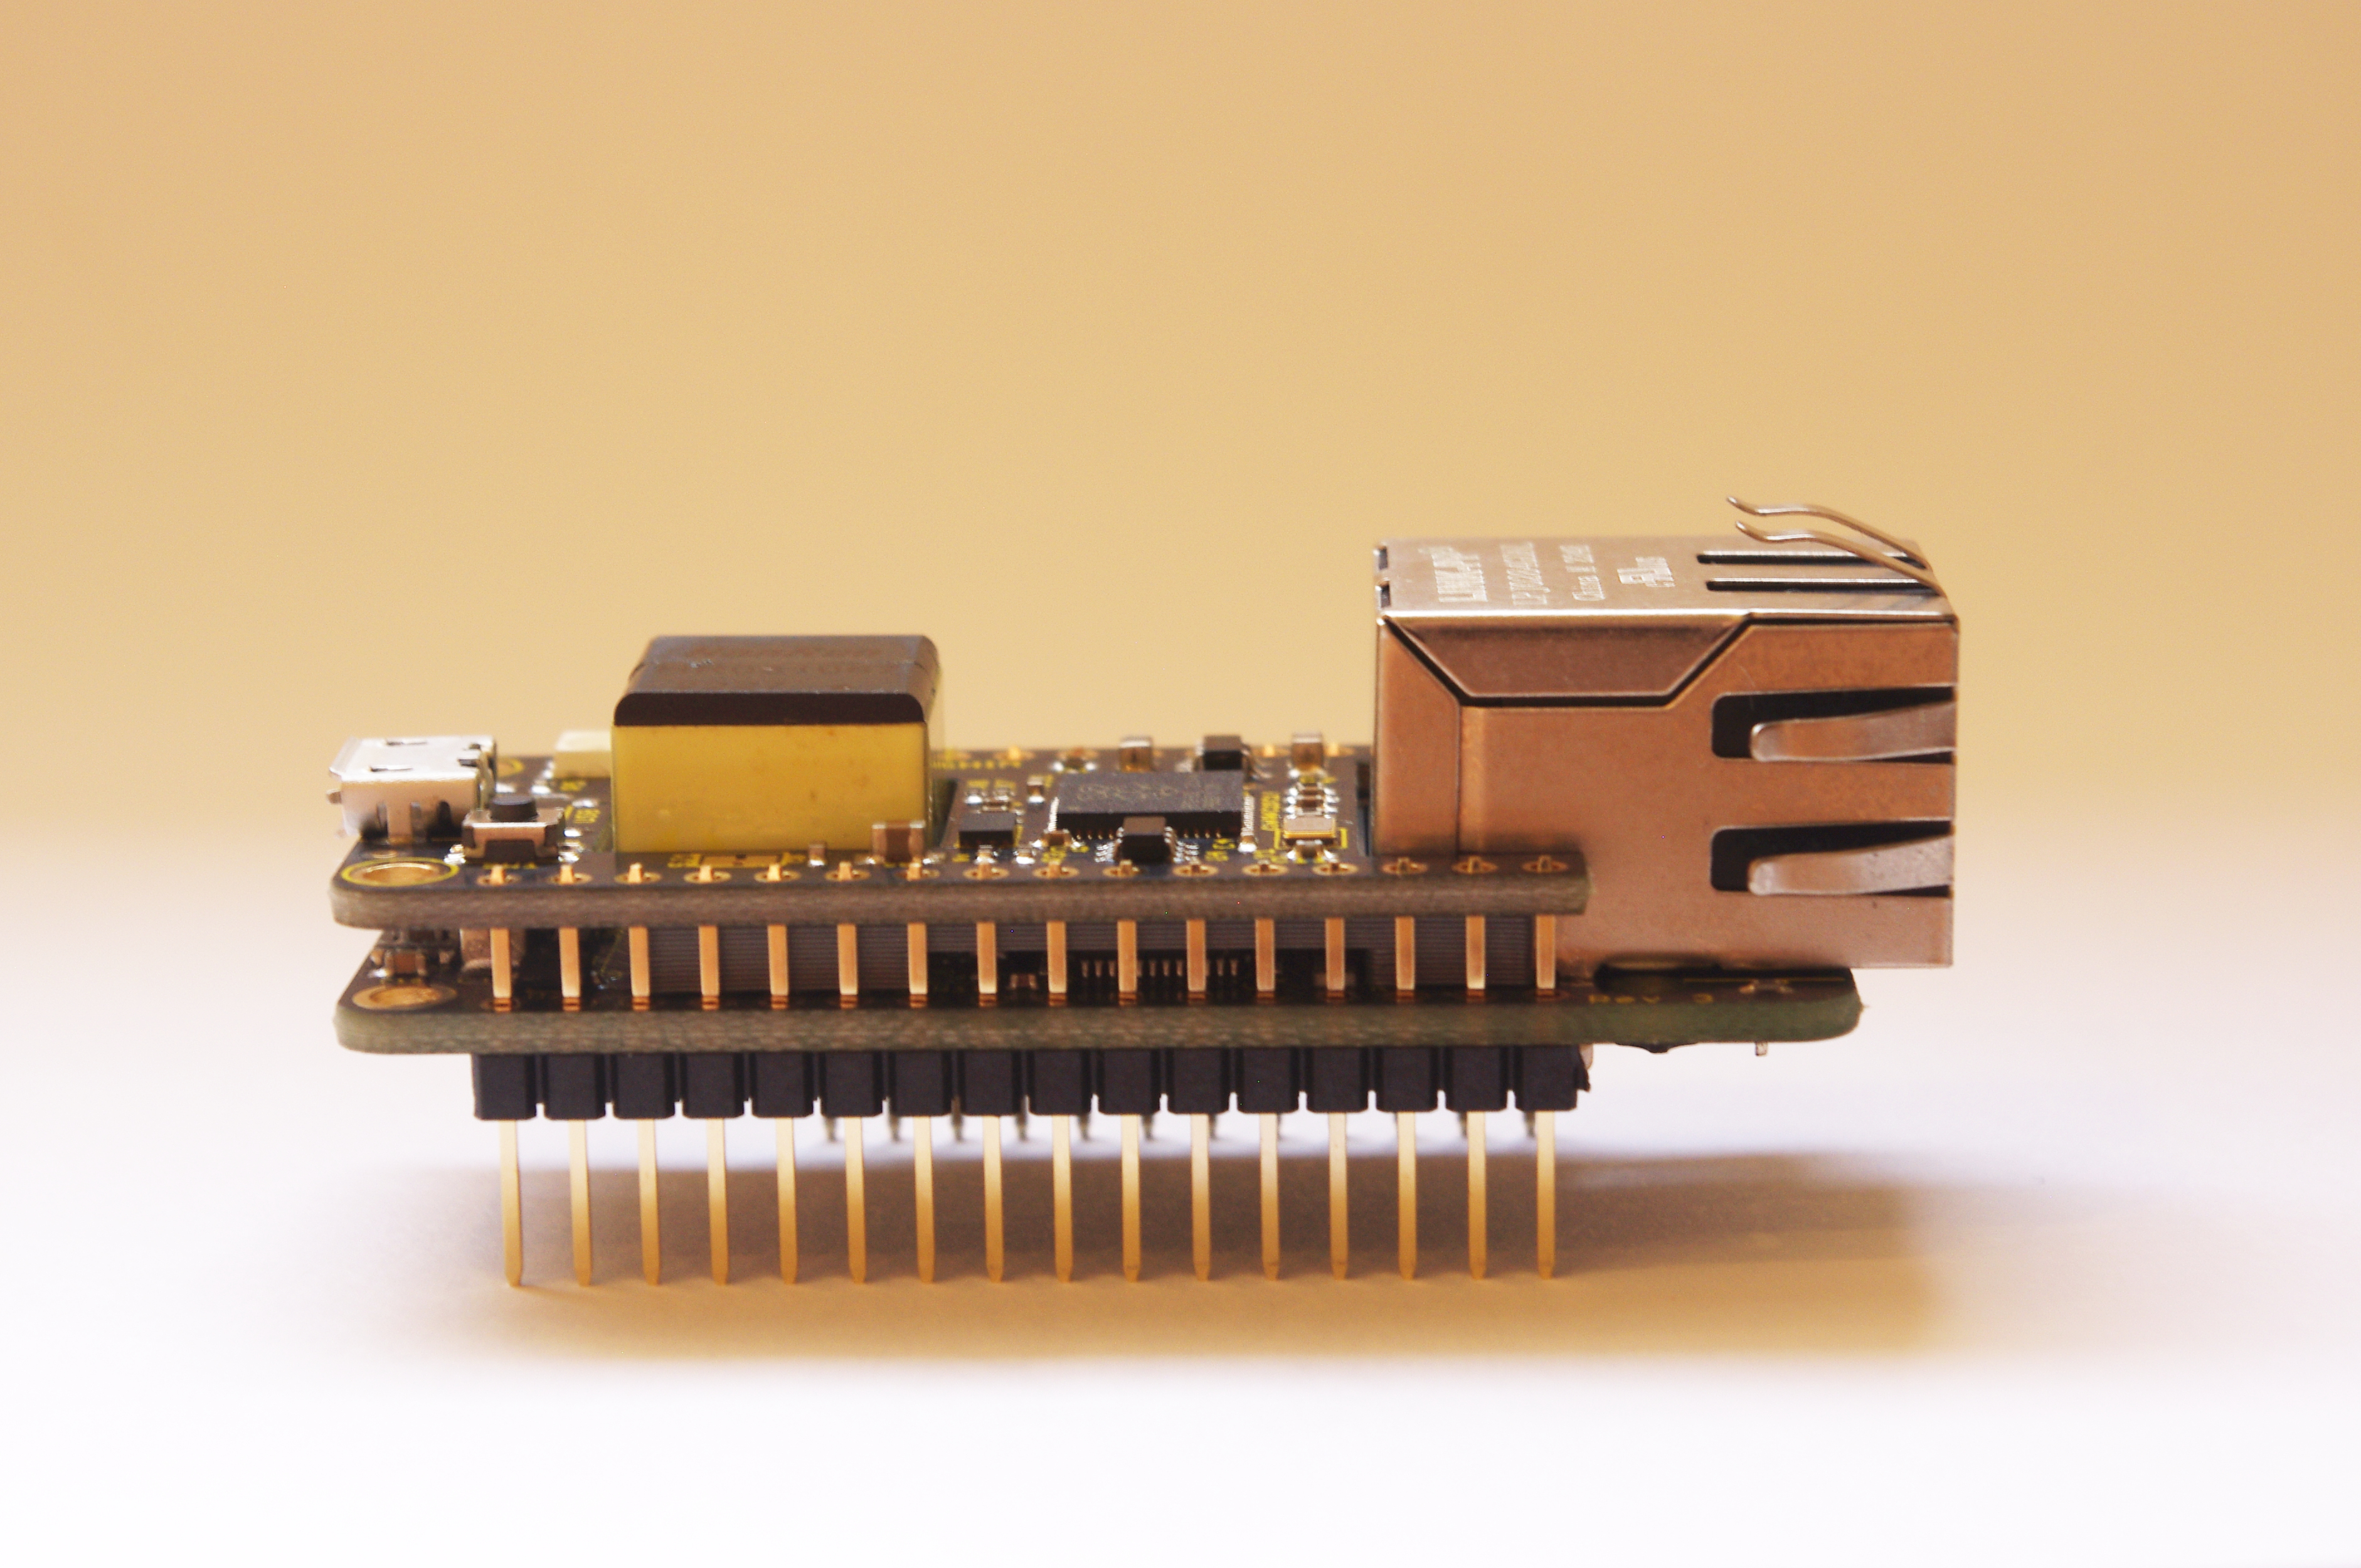
This board is specifically made to be used with the PoE-FeatherWing, it is essentially an RP2040 Feather with a shape customized to fill the empty spaces between the flyback transformer and RJ45 of the PoE-FeatherWing. This allows for the creation of extremely compact Power over Ethernet systems.
Using the popular RP2040 microcontroller from the Raspberry Pi Foundation, you get dual ARM Cortex-M0+ cores @ 133 MHz, 264 kB on-chip SRAM, the powerful PIO peripheral and on this board 4 MB of QSPI flash!
The RP2040 comes with built-in UF2
bootloader for easy flashing, and the board has CircuitPython with Wiznet
W5500 drivers pre-installed, plus a poe_featherwing.py module that sets the
Ethernet connection up for you.
A special feature of this board is a custom chip to enable the familiar single-press to reset, double-press to enter bootloader button! So from a user experience point of view, it behaves exactly the same as the M4-Shim which preceded it.
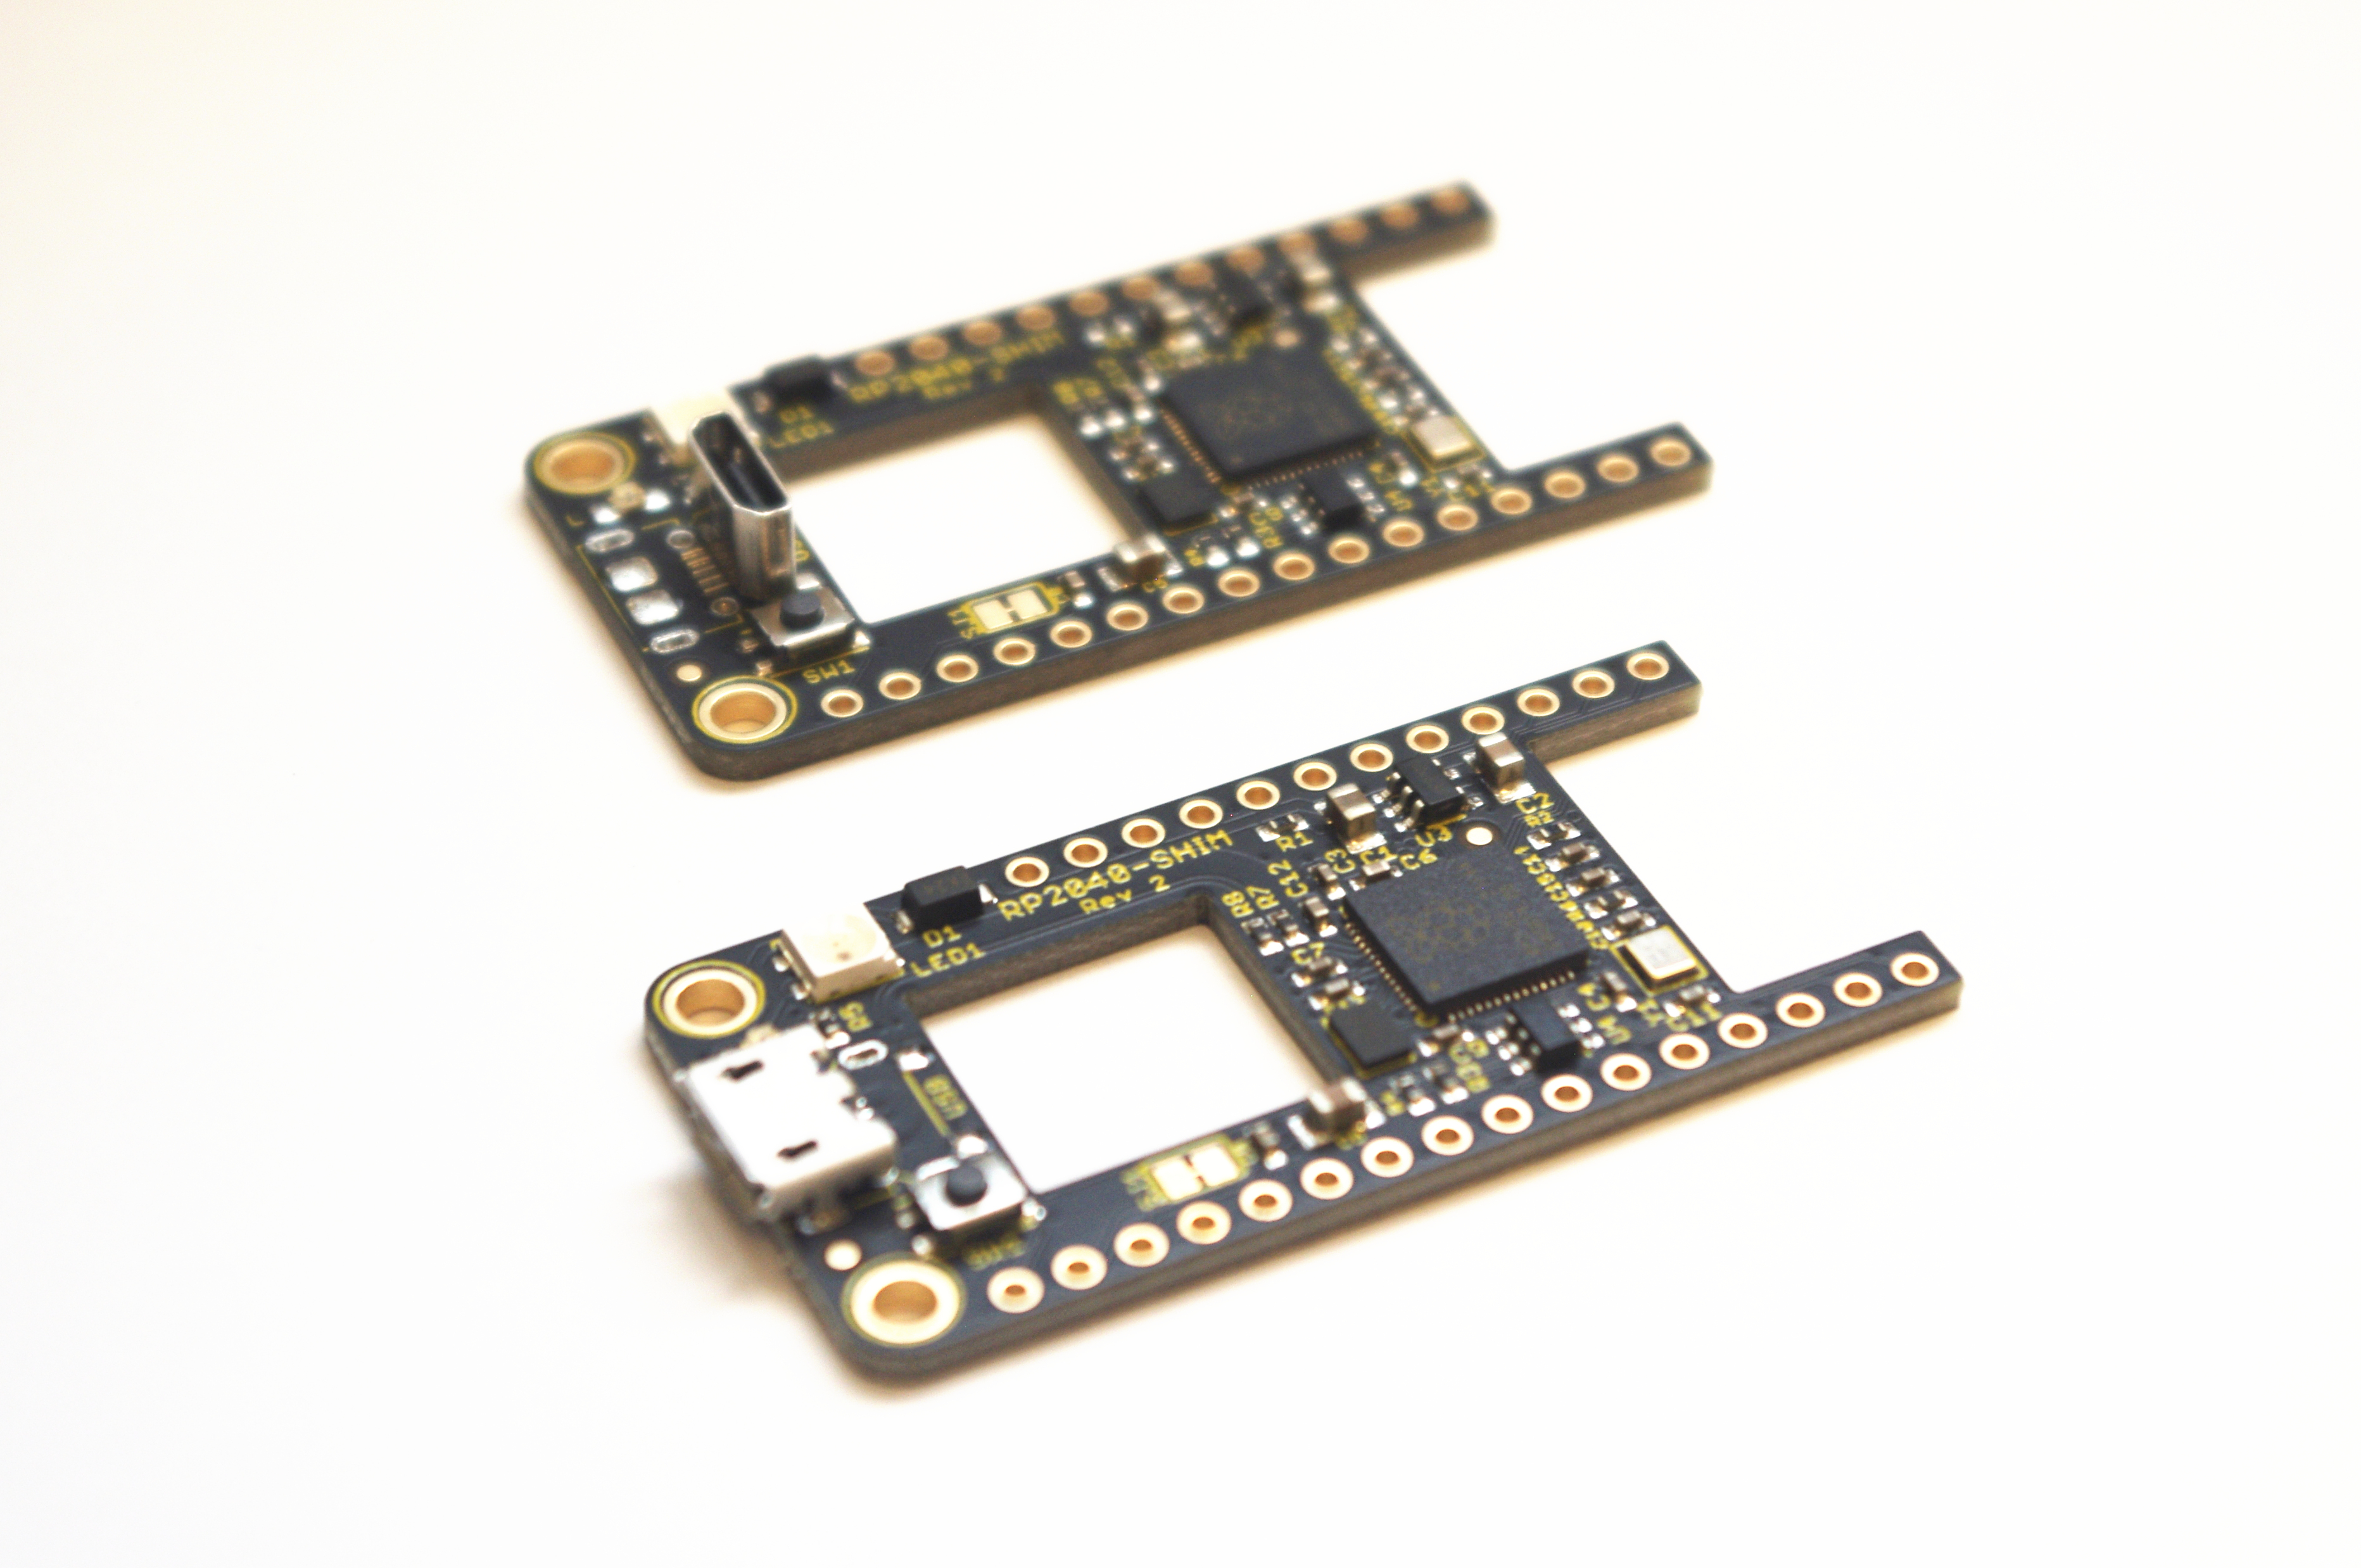
This board comes in two variants: one variant has a horizontal USB connector, the micro USB is in the same place as a normal Feather would have it: facing the opposite direction from the Ethernet jack when mounted on a PoE-FeatherWing. The other option has a vertical USB connector, facing up from the board. It is intended to be used in systems that stack 3 boards: PoE-FeatherWing on the bottom, an application specific board in the middle (which can have its own connectors facing out) and the RP2040-Shim on top, with the USB facing up. A 3-PCB stack would not work well with the standard USB direction: if the RP2040-Shim's USB faces the same way as connectors on the application specific board, they would likely interfere with each other. By facing the USB up, it continues to be easily accessible from the top, no matter what the application board in the middle looks like. The whole RP2040-Shim "user interface" (button, USB, LEDs) is also nicely clustered together.
Features
- Feather-like physical shape, optimized for use with PoE-FeatherWing
- Powered by the RP2040 dual core 133MHz Cortex-M0+ with 264 KB of RAM
- 4 MB of fast QSPI flash with 100K erase cycles
- UF2 bootloader for easy Arduino, MicroPython and CircuitPython compatibility
- CircuitPython with W5500 driver pre-installed to ease integration with PoE-FeatherWing
- Two USB variants: horizontal or vertical Micro-B USB
Pinout diagram
The following diagram shows the pinout of the RP2040-Shim:
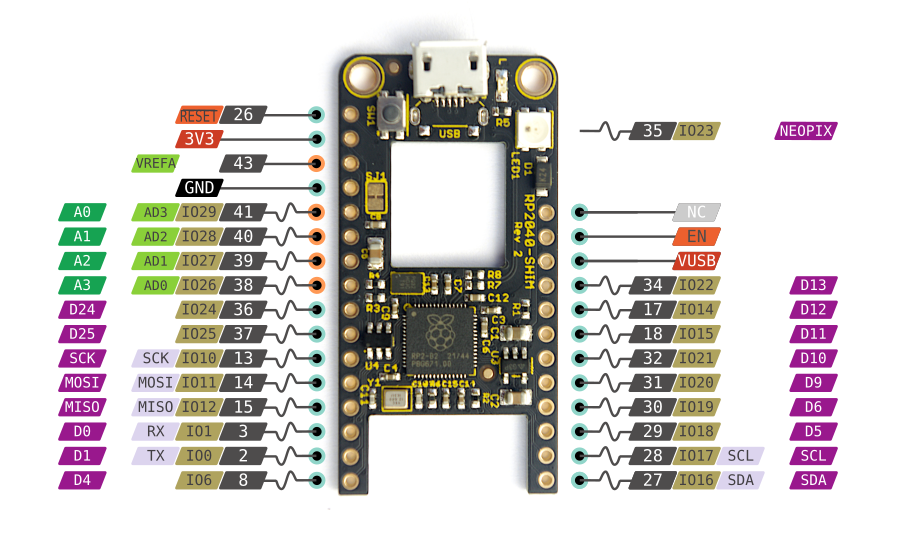
The outer labels document the
CircuitPython,
MicroPython and
Arduino pin labels, which are made
compatible with the
Adafruit Feather RP2040.
However, the actual GPIOs used to connect to these pads differ, so for
Pico SDK and other development
environments that use the GPIO numbers directly, this will have to be
taken into account. The grey labels indicate RP2040 chip pin numbers the
pads connect to and the IOxx labels the respective GPIO numbers.
3D model
Thanks to Sean Radke for sharing this awesome configurable 3D model of the RP2040-Shim!
You can select the USB connector orientation and whether pin headers are included and then export the model in various file formats.
Example code
CircuitPython
CircuitPython for the RP2040-Shim comes pre-installed, but updated versions can be downloaded from the CircuitPython Downloads page. The Wiznet5k driver is part of the CircuitPython Libraries bundle. The example code below shows how to set up the Ethernet interface on a connected PoE-FeatherWing and make HTTP requests.
import board
import busio
import digitalio
from adafruit_wiznet5k.adafruit_wiznet5k import WIZNET5K
import adafruit_wiznet5k.adafruit_wiznet5k_socket as socket
import adafruit_requests as requests

def get_mac(i2c):
  "Read MAC from 24AA02E48 chip and return it"
  mac = bytearray(6)
  while not i2c.try_lock():
      pass
  i2c.writeto(0x50, bytearray((0xFA,)))
  i2c.readfrom_into(0x50, mac, start=0, end=6)
  i2c.unlock()
  return mac

def start_eth():
  "Start PoE-FeatherWing Ethernet connection"
  # PoE-FeatherWing connections
  i2c = busio.I2C(board.SCL, board.SDA)
  eth_cs = digitalio.DigitalInOut(board.D10)
  spi_bus = busio.SPI(board.SCK, MOSI=board.MOSI, MISO=board.MISO)

  # Read the MAC from the 24AA02E48 chip
  mac = get_mac(i2c)

  # Initialize ethernet interface with DHCP and the MAC we have from the 24AA02E48
  return WIZNET5K(spi_bus, eth_cs, mac=mac, hostname="RP2040-Shim-{}")

eth = start_eth()
socket.set_interface(eth)
requests.set_socket(socket, eth)

print (requests.get("http://wifitest.adafruit.com/testwifi/index.html").text)
MicroPython
MicroPython for the RP2040-Shim can be downloaded from the MicroPython Downloads page. The custom build for the RP2040-Shim has the WIZNET5K driver compiled in and configured with correct defaults for the RP2040-Shim combined with the PoE-FeatherWing. It also has all the relevant networking related libraries included.
mip can be
used to install libraries from the MicroPython repo once the Ethernet
connection is initialized and connected. After the urequests library is
installed with import mip; mip.install('urequests'), the following example
code starts the PoE-FeatherWing's Ethernet interface and makes an HTTPS
request. One great advantage of MicroPython over CircuitPython as shown in
this example is support for SSL/TLS!
from network import WIZNET5K
import urequests as requests
from machine import I2C

def get_mac():
  "Read MAC from 24AA02E48 chip and return it"
  i2c = I2C(0)
  return i2c.readfrom_mem(0x50, 0xFA, 6)

lan = WIZNET5K()
lan.config(mac=get_mac())
lan.active(True)

print (requests.get("https://wesp32.com/test.txt").text)
Arduino
The RP2040-Shim can be used from Arduino using the
Arduino-Pico core. In the
boards list, select Silicognition RP2040-Shim. The example code below is
a customized version of the Repeating Web Client Arduino example
code, which uses the
Ethernet3
library to be able to set the DHCP hostname.
/*
  Repeating Web client

 This sketch connects to a a web server and makes a request
 using a PoE-FeatherWing.

 Circuit:
 * PoE-FeatherWing connected to RP2040-Shim

 created 19 Apr 2012
 by Tom Igoe
 modified 21 Jan 2014
 by Federico Vanzati
 modified 31 Jul 2023
 by Patrick Van Oosterwijck

 */

#include <SPI.h>
#include <Ethernet3.h>
#include <Wire.h>

// I2C address of the 24AA02E48
#define I2C_ADDRESS 0x50

// The MAC address for the ethernet controller
// This default value will be overwritten with the value read from the 24AA02E48
byte mac[] = {
  0x0E, 0xAD, 0xBE, 0xEF, 0xFE, 0xE0
};

// Set the static IP address to use if the DHCP fails to assign
IPAddress ip(10, 10, 0, 56);
IPAddress myDns(10, 10, 0, 1);

// initialize the library instance:
EthernetClient client;

char server[] = "wifitest.adafruit.com";       // also change the Host line in httpRequest()

unsigned long lastConnectionTime = 0;          // last time you connected to the server, in milliseconds
const unsigned long postingInterval = 5*1000;  // delay between updates, in milliseconds

byte readRegister(byte r)
{
  unsigned char v;
  Wire.beginTransmission(I2C_ADDRESS);
  Wire.write(r);  // Register to read
  Wire.endTransmission();

  Wire.requestFrom(I2C_ADDRESS, 1); // Read a byte
  while(!Wire.available())
  {
    // Wait
  }
  v = Wire.read();
  return v;
}

void setup() {
  // Start serial port:
  Serial.begin(9600);
  while (!Serial) {
    ; // wait for serial port to connect. Needed for native USB port only
  }

  // Start I2C bus
  Wire.begin();
  // Read the MAC programmed in the 24AA02E48 chip
  mac[0] = readRegister(0xFA);
  mac[1] = readRegister(0xFB);
  mac[2] = readRegister(0xFC);
  mac[3] = readRegister(0xFD);
  mac[4] = readRegister(0xFE);
  mac[5] = readRegister(0xFF);

  // Configure the CS pin for PoE-FeatherWing
  Ethernet.setCsPin(D10);

  // Set hostname
  Ethernet.setHostname("RP2040-Shim");

  // Start the Ethernet connection:
  Serial.println("Initialize Ethernet with DHCP:");
  if (Ethernet.begin(mac) == 0) {
    Serial.println("Failed to configure Ethernet using DHCP");
    // Try to configure using IP address instead of DHCP
    Ethernet.begin(mac, ip, myDns);
    Serial.print("My IP address: ");
    Serial.println(Ethernet.localIP());
  } else {
    Serial.print("DHCP assigned IP ");
    Serial.println(Ethernet.localIP());
  }
  // give the Ethernet shield a second to initialize:
  delay(1000);
}

void loop() {
  // If there's incoming data from the net connection.
  // send it out the serial port.  This is for debugging
  // purposes only
  if (client.available()) {
    char c = client.read();
    Serial.write(c);
  }

  // If five seconds have passed since your last connection,
  // then connect again and send data
  if (millis() - lastConnectionTime > postingInterval) {
    httpRequest();
  }

  // Maintain DHCP lease
  Ethernet.maintain();
}

// this method makes a HTTP connection to the server:
void httpRequest() {
  // Close any connection before send a new request.
  // This will free the socket
  client.stop();

  // Spacing for clarity
  Serial.println();
  Serial.println();

  // If there's a successful connection
  if (client.connect(server, 80)) {
    Serial.println("Connecting...");
    // Send the HTTP GET request:
    client.println("GET /testwifi/index.html HTTP/1.1");
    client.println("Host: wifitest.adafruit.com");
    client.println("User-Agent: arduino-ethernet");
    client.println("Connection: close");
    client.println();

    // Note the time that the connection was made:
    lastConnectionTime = millis();
  } else {
    // If you couldn't make a connection:
    Serial.println("Connection failed");
  }
}